How to Document Your Home Renovation for Insurance
The renovation photos you'd want if the pipe burst or the fire took the kitchen are the same ones you'd want to take anyway. The difference between a settled claim and a dispute is usually a habit you built in month one — not a sprint in the week the roof leaks.
You’ve just spent months on the kitchen. You’ve got the work done, the budget (mostly) held, the photos on your phone. Then the pipe bursts, or the fire takes the range, or the storm takes the new roof. Your insurance claim starts with one question your policy never answered clearly: what was the house like, and what changed?
This post is about the documentation that answers that question. Not the claim itself — that’s your insurer’s process — but the record you create so the claim has something to lean on. The good news: the record you need for insurance is the same record you’d want for any renovation. You’re not building a separate system. You’re building one system and getting insurance as a bonus. If you’re still deciding what to log on day one, the full list of what to track during a renovation is where that starts, and this post is the insurance-specific half of it.
Why insurance claims are won or lost before the damage
An insurance claim is, at bottom, a story. Your side of the story has to be verifiable: what was there, what happened, what it cost, what the fix was. The insurer’s job is to check that story against evidence. If your evidence is a phone full of out-of-order photos and a shoebox of receipts, the claim takes longer and the settlement is smaller than it would have been. If your evidence is a dated timeline with the before-and-after of every stage, the claim moves and the settlement is what the work was actually worth.
This is not a hypothetical gap. It’s the most common thing that separates the people whose claims feel fair from the people whose claims feel like a negotiation. The difference is usually built in month one, when taking a photo is easy. It costs nothing to do it then and a lot to reconstruct later.

The three layers of a renovation insurance record
Think of the record as three layers, each answering a different question.
Layer 1: The baseline. What the house looked like before the project started. This is the set of photos you take in the first week — every room, every wall, every floor, the exterior, the roof, the windows, the electrical panel, the boiler, the fuse box. Not for your memory. For the insurer. If a fire takes the kitchen eight months later, the baseline photos are the proof of what the kitchen was. Without them, the claim starts from the insurer’s estimate of what it “probably” was.
Layer 2: The timeline. What changed, when, and what each stage looked like. This is the photo you take before every major step: before the plasterboard goes up, before the new floor is laid, before the new roof is on. Dated. In order. If something goes wrong mid-project — a leak, a crack, a dispute about what was agreed — the timeline is what lets you say “this is where it was on this date” with a photo to prove it.
Layer 3: The paper trail. Every quote, every invoice, every receipt, every contract. This is the layer people skip because it’s tedious, and it’s the layer that decides the settlement amount. The insurer can see the damage; they can’t see what it cost unless you show them. The paper trail is what turns a claim into a number.
The before-photos: the most important layer
If you only do one thing from this post, do the before-photos.
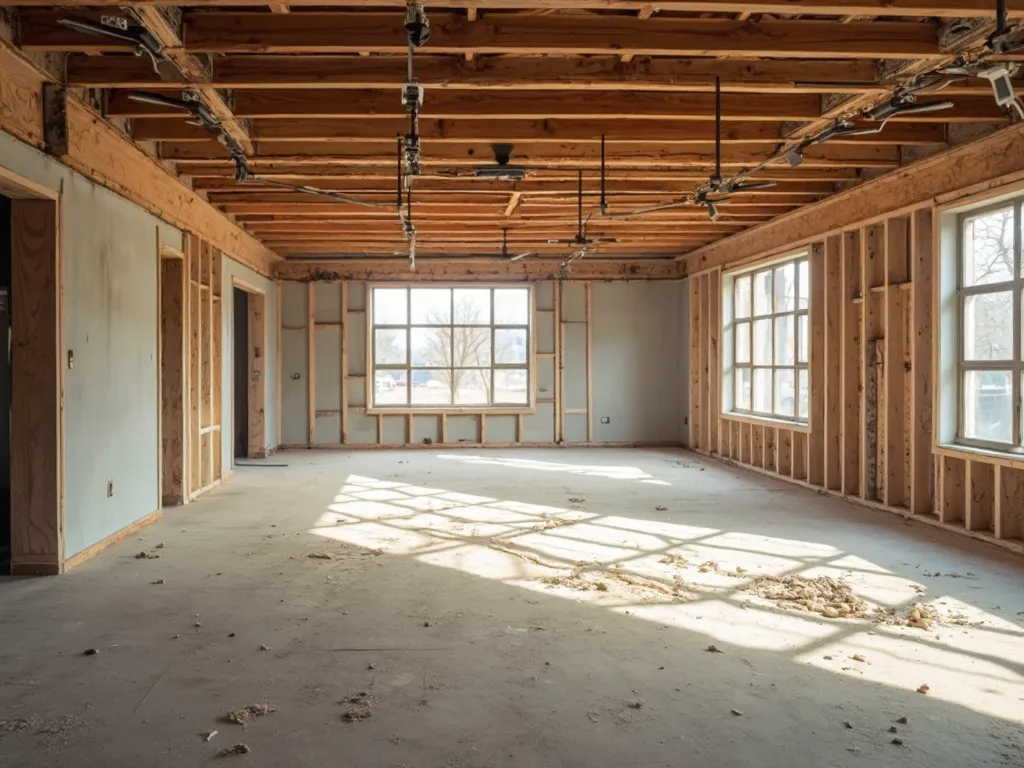
The single most valuable photo in a renovation is the one of an open wall or a floor before it’s covered. Cables, pipes, junction boxes, the old plumbing, the insulation — all of it disappears behind plasterboard or under the new floor, and from that day forward every question about it costs money to answer.
For insurance specifically: the before-photo is what proves the baseline. If a pipe bursts behind the new kitchen wall, the before-photo of the old pipe in the open wall is what shows the insurer the pipe was there, in what condition, and that the new work didn’t cause the burst. Without it, the insurer has to take your word, and your word is worth less than a dated photo. The sequencing that puts these photos on your checklist in the right order is covered in the renovation phases guide — the before-photos belong at the end of each phase, before the next one closes it up.
Take the before-photos the day before the plasterer or screed crew arrives. Wide shots for context, close-ups at anything that carries water or current. Make sure the photos are dated — your phone’s metadata does this, but if you’re using a different device, note the date on the photo itself or in a file name.
The same logic applies to every floor and ceiling you cover. Photograph the old floor before the new one goes down. Photograph the old ceiling before the new one goes up. You’re not documenting for nostalgia. You’re documenting for the day when something under or behind it goes wrong and the insurer asks what was there.

The timeline: one photo per stage, dated
After the baseline, the timeline is the habit that keeps the story in order.
For each major phase of the project — demolition, rough-in, first fix, plastering, flooring, painting, joinery, finishing — take at least one photo before the work starts and at least one after. The “before” photo of the rough-in stage shows the bare walls with the new wiring in place. The “after” photo shows the plasterboard going up. Together they say: “this is what the wall looked like when we started, and this is what it looked like when we finished the stage.”
The date matters more than the quality. A phone photo with a clear timestamp beats a well-composed one taken three days later and saved without a date. If you’re shooting on a different device, add the date to the file name or a note. The point is that the sequence is verifiable and in order, not that the photos look good.
This is also the layer that helps when there’s a dispute. If the contractor says the wall was already cracked when they arrived, and your pre-demolition photo shows it wasn’t, the photo ends the argument. If the insurer says the damage was pre-existing, and your timeline shows the damage appeared after a specific date, the timeline ends that argument. You don’t need a lawyer. You need a dated photo.
The paper trail: quotes, invoices, receipts
This is the layer that decides the settlement amount, and it’s the layer most people skip.
The insurer can see the damage. They can send a surveyor. They can assess the extent of the work. What they can’t assess is what it cost, unless you show them. The paper trail is what turns a claim into a number.
Quotes and contracts. Keep every quote you received, the one you accepted, and the signed contract. The contract is the legal document that says what was agreed. If the work went beyond the scope — and it almost always does — the contract is what defines where the scope ended and the extras began.
Invoices. Keep every invoice, itemised, with dates. The invoice is what the insurer will ask for to verify the cost of the repair. If the invoice says “work done, £2,400” with no line items, the insurer will push back. If the invoice says “demolition, £450; new plumbing, £1,200; plastering, £750” with a date and a signature, the claim moves.
Receipts. Keep every receipt, from the hardware store to the contractor’s materials. This is the layer that’s easy to skip because it’s tedious and the amounts are small. But a claim for a kitchen fire where the invoice says “materials and labour, £8,000” and there’s no receipt trail is a weaker claim than one where the receipts add up to the same £8,000 with dates and item descriptions.
We wrote a whole post on the photo-first receipt system — photograph the receipt at the till, file it against the project, and the paper trail builds itself. The habit takes ten seconds per item and it’s the one with the highest money-recovered-per-second ratio.

One rule for the paper trail: if it has a date and a number and a signature or a logo, it belongs in the project folder. Don’t wait for the project to end to start organising. Start the folder on day one and drop things in as they arrive. A folder you build over six months is worth more than a folder you build over one weekend at the end.
Make the money trail tell the story. A claims file that’s strong on the money side answers four questions without anyone asking twice:
- What was the work, and who did it? The signed quote or work order, with the contractor’s name and the scope in their own words — not the text-message version, the paper one.
- What was it actually? The final invoice, itemised where possible, and the one that matches the quote (or explains why it doesn’t).
- What was paid, and when? A bank statement or card history that lines up with the invoices. Insurers check that the money left the account; invoices with no matching payment pattern read as a reconstruction, not a record.
- What did the materials cost, and where? The hardware-store receipts for the fixtures and fittings you bought yourself — the big trade invoices are usually kept, but a claim that covers the whole project needs the small receipts too, not just the big ticket.
Change orders: get every price change in writing
The documentation habit that quietly prevents the most claims disputes is the cheapest one in this post. Three weeks into a project, the contractor says a wall’s in worse shape than expected and the price is going up, and you agree over coffee in the hallway. Six weeks later the final invoice is a few thousand more than the quote you signed, and when the claim is made the adjuster asks for the paperwork that authorises the increase. There isn’t any — just two memories that have, understandably, drifted apart.
The fix is one rule: no money moves without a line of writing. It can be an email, a message, or a signed addendum — anything dated that says what changed and by how much. If it’s not written down, it’s a conversation, and conversations don’t survive a claims file. Set a contingency budget from the start and every change order becomes a line item you can trace to a decision, which keeps the whole money trail coherent. The mechanics of handling change orders are covered in managing contractor change orders.
Disclosure: the part most people skip
The third layer — and the one that’s easy to skip — is telling your insurer the work is happening.
Your home insurance policy is written around a finished, occupied home. A site with materials on order, scaffolding up, and an open wall is a different risk. Some policies exclude or limit the construction period. Some require you to notify them before work starts. Some have a separate construction cover that you have to buy.
If you’ve significantly altered the home’s value, its contents, or its construction, your policy should reflect that. Under-disclosure can void a claim later. Over-disclosing is rarely a problem. A renovation that raises the property’s value — a new kitchen, an extension, a rewire — can put you underinsured on the structure even if you told them about the project. Check your sum insured after the work.
This is also the part that’s different by country and by insurer, so the honest answer is: check your policy. If you’re in a jurisdiction where construction cover is a separate product, make sure you have it before work starts. If you’re working with a contractor, check their liability and public liability cover — yours alone may not be the one answering if their work goes wrong.
What the end-of-project summary looks like
At the end of the project, write a short summary. Not a report — a summary. Half a page. It should answer:
- What changed (rooms, systems, structure)
- What it cost (total, with the breakdown if you have it)
- Who did it (contractor, trades, DIY)
- When (start and finish dates)
- What materials were used (for anything that carries a warranty)
This summary is the cover sheet for the whole record. When the insurer asks for the file, this is the first thing they read. When you sell the house, this is the first thing the buyer’s surveyor reads. It’s the same document doing two jobs.
The good news: if you’ve been taking the baseline photos, the timeline, and keeping the paper trail, the summary writes itself in ten minutes. If you haven’t, it’s a lot harder to reconstruct, and that’s the cost of skipping the habit.

The system, in practice
None of this requires a dedicated tool. A folder on your phone, a dated photo habit, and a receipts subfolder is enough. A notebook with a page per room and a date column works too. A spreadsheet with a column for stage, date, cost, and contractor works.
What matters is that the record is attached to the project, not to a generic photo album or a shoebox. Every photo, every receipt, every note belongs to the renovation, and when you need it, you find it in one place.
The wrap-up
The documentation that makes an insurance claim smooth is the same documentation that makes every other part of a renovation easier. The before-photos answer the “what was there” question. The timeline answers the “what changed, when” question. The paper trail answers the “what did it cost” question. The disclosure keeps the policy honest. The end-of-project summary ties it all together.
None of it takes more than a minute per item if it happens in the moment. The cost of skipping it shows up only when something bad happens, and by then it’s too late to take the photo of the wall before it’s covered.
The habit is cheap. The record is worth it. Start the folder on day one, take the before-photos, keep the receipts, and when the claim comes — or when the buyer’s surveyor asks — the answer is already in the file.
Sources and further reading
The ranges and guidance above are drawn from direct project experience and from the bodies below, which publish the underlying standards, rules and market data. They are worth reading directly before you commit money.
- Facts + statistics: homeowners and renters insurance — Insurance Information Institute
- Home fire safety research and guidance — National Fire Protection Association
- Home improvements and repairs — US Dept. of Housing and Urban Development
Frequently asked questions
Does home insurance cover damage that happens during a renovation?
Usually less than people assume, and it depends entirely on your policy. Most home insurance policies are written around a finished, occupied home. A site with materials on order, scaffolding up, and an open wall is a different risk, and some policies exclude or limit that period. Read your policy's construction and renovation clauses, and ask your insurer directly. If you're working with a contractor, check their liability and public liability cover — yours alone may not be the one answering.
What photos do I need for a home insurance claim?
Before-and-after, dated. The ones that matter: the affected area before any work started, the damage when it happened, and the site at each stage of repair. Photos of the work in progress — especially anything that was hidden by it — are what make the story verifiable. A phone camera with timestamps in the metadata is enough; what matters is that the sequence exists and is in order.
Do I need to tell my insurance company I'm renovating?
Yes. If you've significantly altered the home's value, its contents, or its construction, your policy should reflect that. Under-disclosure can void a claim later; over-disclosing is rarely a problem. A renovation that raises the property's value (a new kitchen, an extension, a rewire) can put you underinsured on the structure even if you told them about the project. Check your sum insured after the work.
How long should I keep renovation receipts and invoices?
Longer than the warranty period of the work, and in many cases indefinitely if the project raises your home's value. Insurance claims can be disputed years later, and a resale buyer or their surveyor may ask what was done and what it cost. A digital copy — a photo or PDF — is enough to keep the record safe; the paper is a backup, not the source of truth.
What is the single most important document in a renovation insurance claim?
The before-photo. Everything after that — damage, repair, receipt — is about what changed. The before-photo is what proves what was there, when, and in what condition. If you only take one photo per room, make it the one taken the day before the plasterer or screed crew arrives.
What do I do if damage happens on site before the renovation is finished?
Stop work if it's unsafe, photograph the damage before anyone cleans up or patches it, and notify your insurer before anyone repairs. Most policies require prompt notification; the exact deadline is in your policy. Keep the site as close to how you found it as is safe, because the insurer's surveyor will want to see it. Then put the paperwork in order: who was on site, what was in progress, what was on order.
Does documenting a renovation help when I sell the house?
Yes, in the same way it helps with insurance. A dated record of what was done, by whom, for how much, and with which materials is part of the story a buyer (or their surveyor) will ask for. The same photo timeline and receipt folder that supports a claim also supports a higher-confidence resale.
Keep reading
Home Renovation Phases: The 6 Stages You Can't Skip
The 6 home renovation phases you can't skip, from planning to snag-free handover, with what actually matters to track at each stage.
How to Organize Renovation Receipts: A Photo-First System
How to organize renovation receipts — a photo-first system that keeps every receipt, invoice, and contract in one place.
How to Plan a Home Renovation: 6 Phases from Idea to Handover
How to plan a home renovation — 6 phases from inspiration to handover, with what to track and watch for at each stage.