How to Plan a Home Renovation: 6 Phases from Idea to Handover
Planning a home renovation doesn't have to mean spreadsheets, anxiety, and surprises that blow your budget. The right approach breaks the entire process into discrete, manageable steps — each with a clear start, a clear deliverable, and a clear next step. This guide walks you through every phase of a home renovation, from the very first decision to the final walkthrough, with realistic timelines and costs so you know exactly what comes next.
If you’re planning a home renovation for the first time, the sheer number of decisions can feel overwhelming. Which comes first — the design or the budget? How do you compare contractor quotes? What happens if things go over budget mid-project?
This guide breaks how to plan a home renovation step by step into six clear phases. Each phase has a specific set of decisions, deliverables, and next steps. By the time you finish each phase, you’ll know exactly what comes next and what decisions still need to be made.
Whether you’re refreshing a bathroom, gutting a kitchen, or planning a full-home renovation, the process is the same — it just scales up in complexity. Let’s go through it.
Phase 1: Define what you want (no budget talk yet)
Before you think about money or contractors, you need to know what problem you’re solving. Every renovation that starts without a clear problem statement ends with regret — someone upgraded the faucet while the floor was still leaking.
1.1. List every problem in the space
Walk through the space you want to renovate and write down every issue:
- Functional problems — The counter is too low. The layout doesn’t work for how you cook. There’s no storage.
- Aesthetic problems — The finishes are outdated. The lighting is terrible. The colours don’t work.
- Performance problems — Drafty windows. Leaky pipes. Poor insulation.
- Comfort problems — Too cold in winter. Too hot in summer. Not enough natural light.
Don’t filter anything yet. Get the full list on paper. This is your raw material.
1.2. Prioritise: essential vs nice-to-have
Now categorise every item:
| Priority | What it means | How many should you have |
|---|---|---|
| Non-negotiable | Dealbreaker. Must fix or the house is unusable for its intended purpose. | 2–4 |
| Important | Significantly improves function or comfort, but not urgent. | 3–6 |
| Nice to have | Would be great, but not worth blowing the budget for. | Any |
This prioritisation is your first filter. When budget realities hit (and they always do), you’ll keep the non-negotiables, adjust the important ones, and cut the nice-to-haves. But only after you’ve seen the numbers.
1.3. Research what you like (and what it costs)
At this stage, you’re just building taste and setting expectations:
- Look at inspiration photos (Pinterest, Instagram, design directories)
- Visit showrooms to touch materials
- Browse supplier websites for pricing
- Read forums and Reddit threads about renovation experiences
The goal isn’t to lock in a design — it’s to develop a realistic sense of what “good” costs in your market. You’ll be surprised how quickly $5,000 turns into $25,000 when you start thinking about custom cabinetry, quartz countertops, and professional-grade appliances.
Phase 2: Define your budget (before any design work)
This is the step most people skip, and it’s the one that saves them the most money and heartache.
2.1. Set your absolute maximum spend
Decide in advance: what is the maximum amount you’re willing to spend on this renovation, no matter what? This number might come from savings, a home equity line of credit, or other financing. Whatever it is, write it down and treat it as a wall — nothing happens beyond it without deliberate reconsideration.
2.2. Add your contingency
Once you know your maximum, subtract your contingency:
| Renovation type | Recommended contingency |
|---|---|
| Cosmetic only (paint, flooring, fixtures) | 10% |
| Surface-level kitchen/bath (no moving walls) | 15% |
| Full kitchen or bathroom with layout changes | 20–25% |
| Full-home renovation | 25–30% |
If your maximum is $50,000 and you’re doing a kitchen with layout changes, your working budget is $40,000–$42,500. That $7,500–$10,000 is your shock absorber — for the rot behind the wall, the code-mandated electrical upgrade, the cabinet that arrives damaged and needs replacement.
2.3. Research real costs for your scope
This is where Phase 1 research meets Phase 2 math:
| Item | Low end | Mid-range | High end |
|---|---|---|---|
| Kitchen cabinets (per linear foot) | $150–$300 | $300–$600 | $600–$1,200+ |
| Countertops (per sq. ft.) | $40–$80 (laminate) | $80–$150 (quartz) | $150–$300+ (granite/marble) |
| Flooring (per sq. ft., installed) | $3–$6 (vinyl) | $6–$12 (LVP/tile) | $12–$25+ (hardwood/natural stone) |
| Appliances (full kitchen set) | $8,000–$12,000 | $12,000–$20,000 | $20,000–$40,000+ |
| Bathroom vanity + fixture | $800–$1,500 | $1,500–$3,000 | $3,000–$6,000+ |
| Plumbing rough-in (per point) | $500–$800 | $800–$1,200 | $1,200–$2,000+ |
| Electrical (per point/panel) | $300–$600 | $600–$1,200 | $1,200–$2,500+ |
| Labour (kitchen, per sq. ft.) | $100–$180 | $180–$300 | $300–$500+ |
These are ballpark figures for 2026. They vary by region, by contractor, and by material choice. But they give you a starting point.
2.4. Build a spreadsheet (or use an app)
Once you have your scope and your research, build a budget with every line item:
- Demolition and disposal
- Materials (cabinets, counters, flooring, fixtures, paint)
- Appliances
- Labour
- Permits and inspections
- Contingency
- Temporary living arrangements (if needed)
A dedicated budget tracker does this automatically — you enter your budget, log every expense as it happens, and see your remaining buffer in real time. You always know whether you’re on track or in trouble. The budget guide walks through the structure; comparing contractor quotes line by line comes next once numbers are locked.
Phase 3: Design the scope
If the project is a wet room, the bathroom renovation sequence matters as much as the drawings — waterproofing and fixture order are where DIY schedules usually break.
Now that you know what you want and what you can afford, it’s time to design.
3.1. Create a floor plan (even a rough one)
You don’t need architectural drawings yet. A rough sketch showing:
- Wall locations (which stay, which move)
- Appliance positions
- Plumbing locations (sink, toilet, shower)
- Electrical switch and outlet locations
- Window and door positions
This rough plan tells you whether your layout is even physically possible before you spend money on professional drawings.
3.2. Decide what stays and what goes
| Category | Questions to answer |
|---|---|
| Structural | Are walls moving? Are you changing the floor plan? |
| Mechanical | Are you moving plumbing, electrical, or HVAC? |
| Finishes | Which materials are you using? (Save samples for later.) |
| Fixtures | Which fixtures (faucets, lights, appliances) are you keeping or replacing? |
If the answer to “structural” or “mechanical” is yes, you need professional drawings. If the answer to both is no and you’re just changing finishes and fixtures, a contractor can work from a written brief.
3.3. Get professional drawings (if needed)
For anything that moves walls, changes the floor plan, or adds square footage:
- Architect or designer: Produces construction drawings and specifications
- Cost: $2,000–$8,000 depending on scope
- Timeline: 2–6 weeks
The drawings serve two purposes: they get your permits approved, and they give contractors a common set of documents to bid on. Without drawings, every contractor is making assumptions — and their bids won’t be comparable.
3.4. Get permits
Most structural, electrical, and plumbing work requires permits. The process varies by municipality but generally involves:
- Submitting your drawings and application
- Paying a permit fee (often a small fraction of one percent of the build cost — confirm locally)
- Waiting for review (1–4 weeks)
- Scheduling inspections as work progresses
Your contractor should handle permits for you, but confirm this upfront. Unpermitted work can affect your home insurance, your ability to sell, and your ability to get financing for future projects. The full picture of what a permit does, what triggers one, and what skipping costs is in do I need a permit for a home renovation?.
Phase 4: Select your contractor
Before you hire anyone, be honest about DIY versus hiring a contractor for each trade — the decision changes both budget and timeline.
4.1. Get at least three quotes
Contact contractors who specialise in your type of project. For each, provide:
- Your floor plan / drawings
- A written scope of work
- The materials and finishes you’ve selected (or at least a range)
Ask each contractor to quote on the same scope so the quotes are comparable. If one contractor includes demolition and another doesn’t, the prices mean nothing.
4.2. Compare quotes on scope, not price
A quote that’s $10,000 cheaper might be cheaper because the contractor:
- Excluded something critical
- Plans to use cheaper materials than quoted
- Has a tighter timeline that requires more labour
- Is desperate for work and may cut corners
Look at each line item. Ask questions about discrepancies. The cheapest quote is rarely the best value.
4.3. Check references and past work
Before hiring:
- Ask for 3–5 recent client references and actually call them
- Ask to see completed projects similar to yours
- Check online reviews (Google, trade directories, local forums)
- Verify the contractor is licensed and insured
4.4. Sign a detailed contract
Your contract should include:
- Detailed scope of work
- Payment schedule (never pay more than 10–20% upfront)
- Timeline with start date and completion date
- Change order process (how modifications are priced and approved)
- Warranty / guarantee
- Clean-up and disposal terms
- Insurance and licensing information
Never start work without a signed contract. Period.
Phase 5: Manage the construction
This is where a single project record becomes your best friend.
5.1. Set up your tracking system
Before the first wall comes down:
- Enter your total budget and line-item budgets
- Enter your timeline (start date, expected completion date)
- Save your contractor’s contact information and schedule
- Take baseline photos of the space from every angle
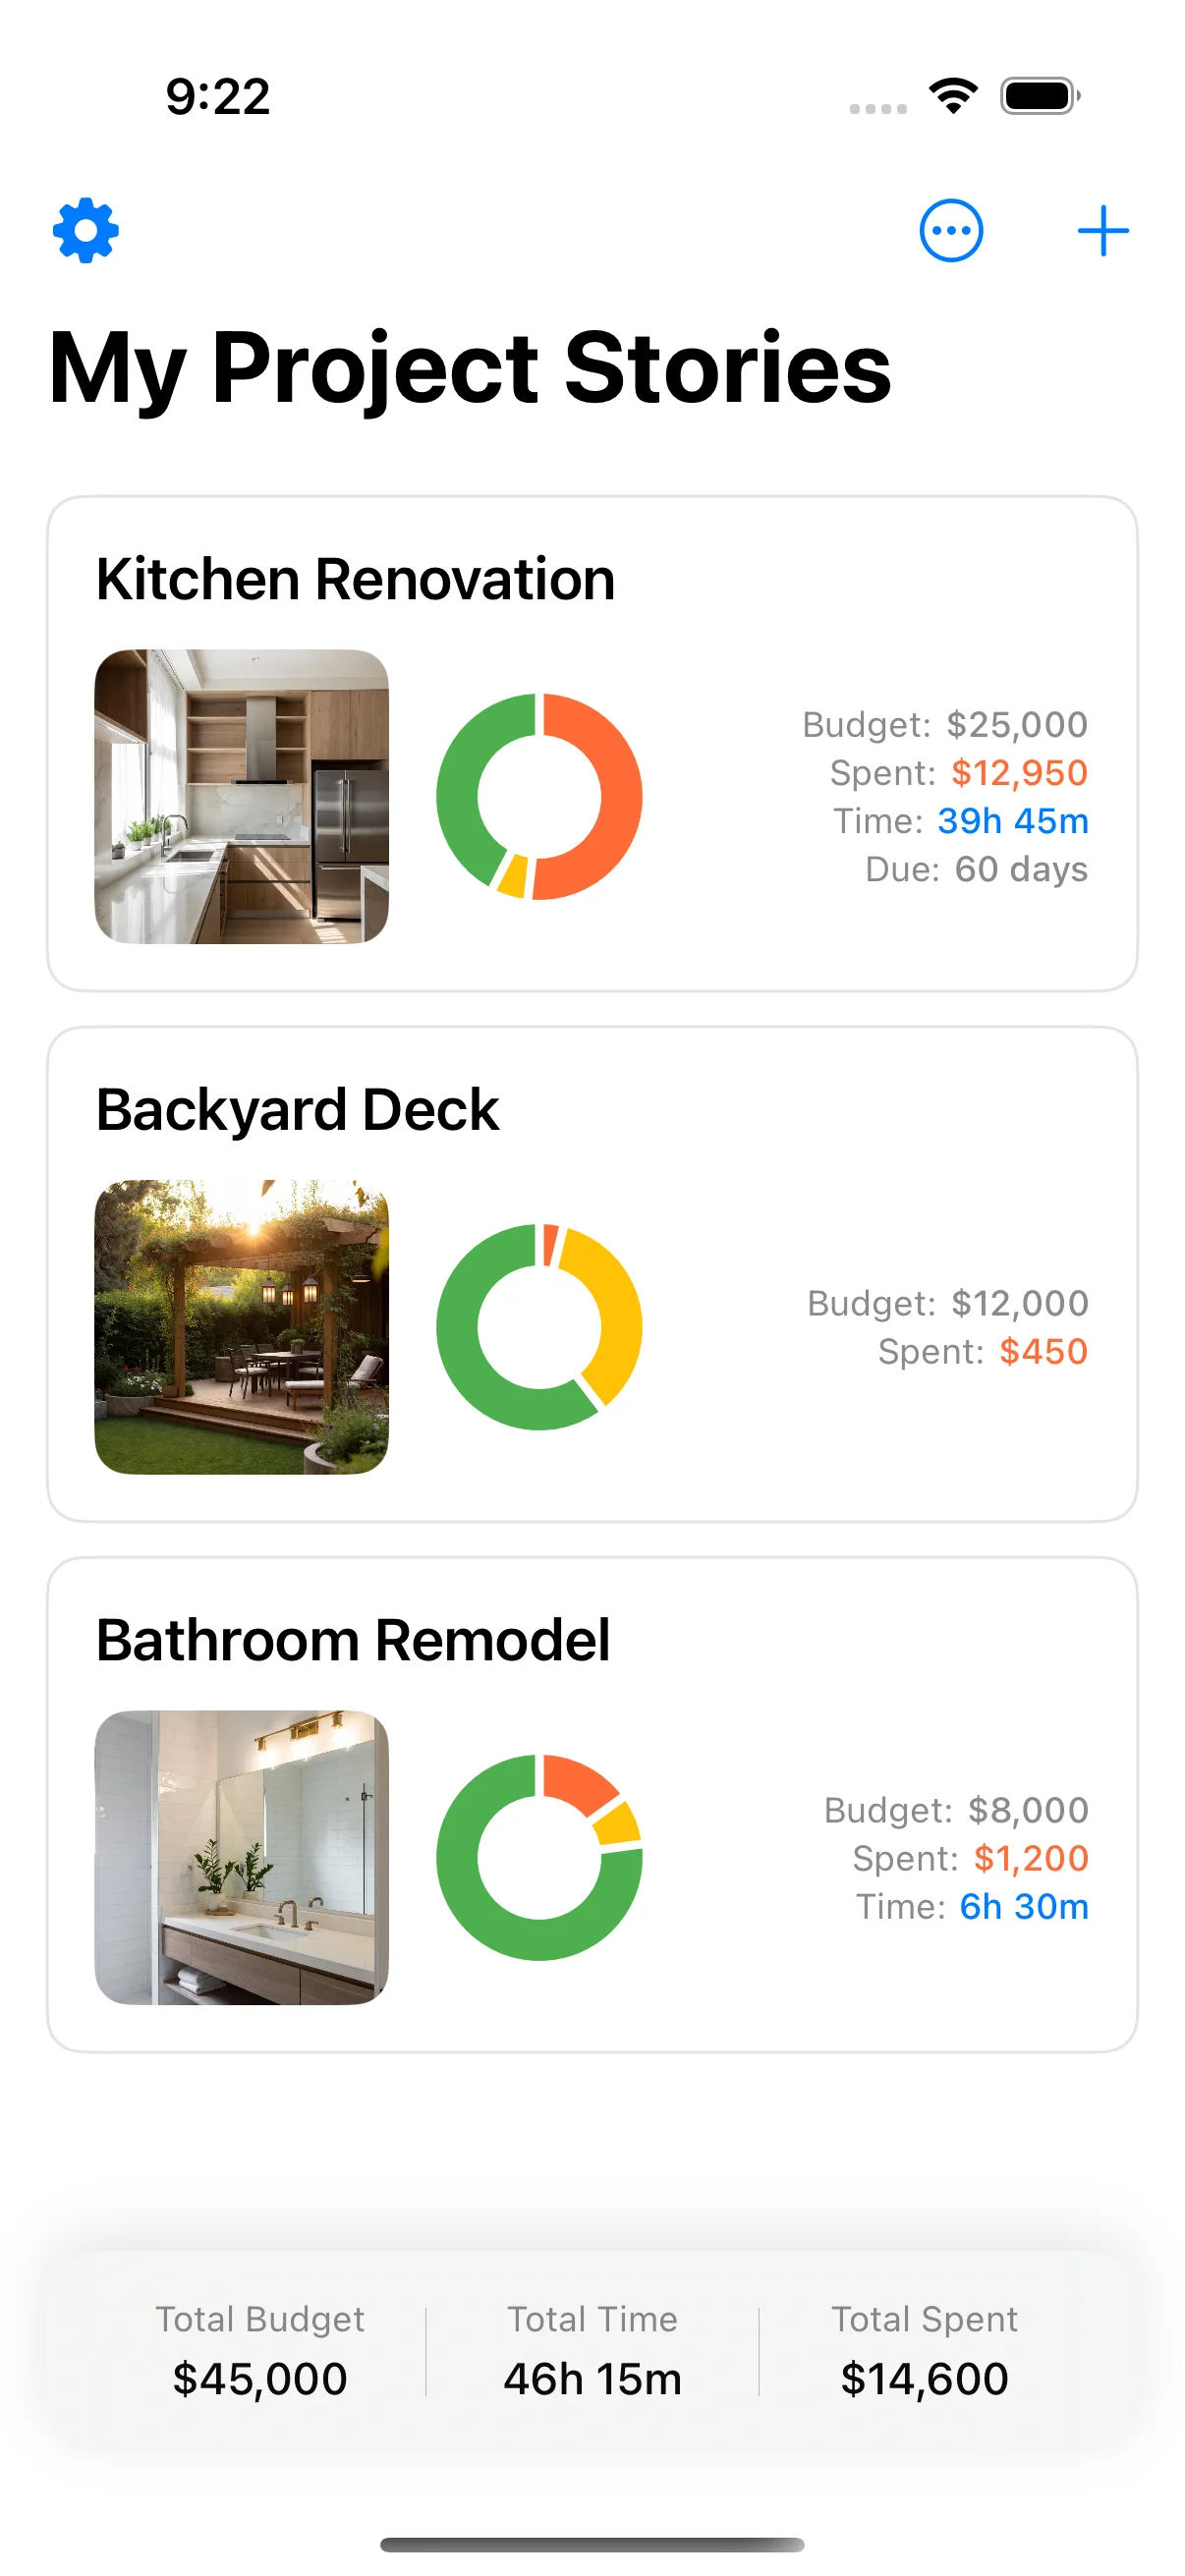
A phone-first renovation app lets you do all of this in one place. Create a project, add rooms, set budgets per room, and start logging expenses and photos from day one.
5.2. Log expenses as they happen
Every invoice, receipt, and change order goes into your tracker. The key is real-time logging:
- If you discover a $2,000 issue in week one, you can adjust scope or contingency while there’s still time.
- If you discover it in week eight, the money is already spent and there’s nothing you can do about it.
The remaining buffer updates the moment a new expense hits, so you always know where you stand.
5.3. Track progress photos
Take photos weekly. Not just “before and after” — actual progress shots that show:
- Rough-in work (plumbing, electrical behind walls)
- Material deliveries
- Installation progress
- Problem areas that need addressing
These photos become your record of what’s behind the walls. If a future problem arises (and it will), you’ll know exactly what’s in the walls without cutting anything open.
5.4. Communicate through one channel
Pick one method of communication with your contractor and stick to it. Email, project app, or a dedicated messaging thread. In-person conversations that disappear into memory are the single biggest source of “but you said you’d handle that” disputes.
5.5. Review budget and timeline weekly
Every Friday (or whatever works for you):
- Check expenses against budget
- Check progress against timeline
- Identify any risks or issues early
- Make decisions while there’s still time to act
Phase 6: Close out and celebrate
6.1. The walkthrough
Before final payment, do a systematic walkthrough with your contractor. Room by room, fixture by fixture:
- Check every switch and outlet
- Test every faucet and toilet
- Open and close every cabinet door and drawer
- Look for scratches, cracks, or finish defects
- Make a snag list (our renovation checklist covers this in detail)
6.2. Get all documentation
Before you hand over the final payment, collect:
- All warranties for appliances, fixtures, and materials
- Builder’s certificates for electrical and plumbing work
- As-built drawings (if anything changed from the original plans)
- Contractor’s contact information for future service
6.3. Review your experience
Take notes while it’s fresh:
- What went well?
- What didn’t?
- What would you do differently?
- What’s the actual total cost vs. your original budget?
This information is invaluable for your next renovation.
6.4. Take final photos
Document the finished space from every angle. These are your “after” photos — they’ll be beautiful in a framed album and incredibly useful years from now when you’re troubleshooting a leaky pipe behind the same wall.
Common pitfalls (and how to avoid them)
Pitfall 1: Designing before budgeting
You pick out a $12,000 range and a $4,000 sink before knowing your total budget. Now you’ve already committed 30% of your budget to two items.
Fix: Set your total budget first. Allocate per-category limits (cabinets: $15k, counters: $5k, appliances: $8k, etc.) before making any selections.
Pitfall 2: Underestimating timeline
You think the kitchen will be done in 8 weeks. It takes 14. You’re living in a partially-demolished kitchen for six extra weeks.
Fix: Plan for 12–14 weeks for a kitchen. Build buffer weeks into your timeline and assume everything that can go wrong will. The kitchen renovation timeline guide walks through this in detail.
Pitfall 3: No contingency
You budget exactly $40,000 with nothing extra. A rotted subfloor behind the cabinet line adds $3,500. Now you’re over budget.
Fix: Budget 15–25% contingency for anything beyond cosmetic work. Our guide on contingency budgets explains exactly how much you need and why.
Pitfall 4: Making mid-project changes
Halfway through, you decide you want a different layout. The cabinets are already ordered. The walls are already torn down.
Fix: Finalise every decision before demolition. If you’re not 90% sure about something, don’t lock it in. But commit to a decision by the time permits are submitted.
Putting it all together
Planning a home renovation is a process — not a single decision or a single day of action. Each phase builds on the previous one:
Define what you want → Set your budget → Design the scope → Select a contractor → Manage construction → Close out
Skip a phase and you pay for it. Follow them in order and you end up with exactly what you wanted, on budget, and with far less stress than most people experience.
The renovation budget template gives you a starting point for your budget. The 7 phases of a home renovation guide shows you what happens during each phase. And a phone-first tracker keeps every step of the process from your first decision to your final walkthrough — so you’re never guessing where you stand.
Related posts
- Renovation Budget Template (Free PDF + Google Sheet)
- How to Budget a Home Renovation Without Going Over
- The 7 Phases of a Home Renovation
- The 20% Rule: How Much Contingency Should You Budget?
- A Realistic Kitchen Renovation Timeline
Ready to plan your renovation from day one?
Understanding how to plan a home renovation step by step is only half the equation. The other half is tracking your progress — your budget, your timeline, your photos, and your receipts — as the project actually unfolds.
Home Stories does all of that automatically. Set up a project, define your rooms and budgets, and start logging expenses and photos from the first decision to the final walkthrough. It’s free on the App Store, and it replaces the chaos of spreadsheets, notebooks, and scattered photos.
Vertical projects have their own clocks — how long a loft conversion takes is a useful reality check before you promise a finish date.
If you just got the keys to a rough house, the fixer-upper first-month order is a tighter starting list than a full renovation plan.
Keep an insurance-ready trail while you build: documenting a renovation for insurance.
Brand-new keys and no idea which room first? Start with where to start renovating a new house.
Sources and further reading
Regulatory and consumer-protection pages worth reading before you commit money on a full renovation plan.
- Home improvements and repairs — US Dept. of Housing and Urban Development
- How To Avoid a Home Improvement Scam — US Federal Trade Commission
- Building regulations approval — GOV.UK
Frequently asked questions
What is the first step in planning a home renovation?
The first step is defining what you want to achieve, not what you think you can afford. Sit down with your household and make a list of every problem in the space — leaky faucet, outdated layout, insufficient storage, poor lighting, uncomfortable workflow. Then prioritise: which issues are dealbreakers, which are annoyances, and which are nice-to-haves. This prioritisation becomes the foundation for everything that follows. Without it, you'll either over-spend on things that don't matter or compromise on the changes you actually need. Once you have your prioritised list, that's when you move to step two: figuring out what a renovation like that costs.
How much should I budget for a home renovation?
There's no single number, but the data is clear. Cosmetic kitchen updates (paint, new hardware, resurface cabinets) run $3,000–$8,000. Mid-range kitchen renovations (new cabinets, countertops, appliances, flooring) typically run $25,000–$55,000. Full kitchen gut-and-replace runs $40,000–$90,000 depending on home size and finishes. Bathroom renovations range from $7,000 for a surface refresh to $35,000 for a full reconfiguration. The key is to set your maximum spend before looking at any design options, then work backwards from that number. Home Stories lets you set a total budget and track every line item against it in real time, so you never discover at week eight that you've blown past budget — [download free on the App Store](https://apps.apple.com/app/id6754754960).
How long does a home renovation take?
Timelines vary wildly by scope, but typical ranges are: cosmetic updates (paint, flooring, fixtures) — 2–4 weeks; kitchen renovation — 12–20 weeks total including design, permits, and cabinet ordering; bathroom renovation — 8–14 weeks; room additions — 16–32 weeks; full-home renovation — 24–48 weeks. The timeline almost always starts before demolition. Expect 2–6 weeks for design and planning, 1–4 weeks for permits, and then the construction timeline. The single biggest source of delay is waiting for cabinets, which often take 8–12 weeks to deliver. Plan accordingly — most renovators underestimate total timeline by 30–50%.
Should I hire an architect or a contractor first?
For simple cosmetic work, just get contractor quotes. For anything that involves moving walls, changing the floor plan, or adding square footage, start with an architect or designer to produce construction drawings. The architect doesn't build your project — they produce the plans and specifications that contractors bid on. Getting this right upfront saves thousands in change orders later. A designer is a good middle ground if you don't need structural changes but want help with layout, materials, and fixtures. Once you have drawings (or even a detailed brief for a straightforward project), get at least three quotes and compare them on the same scope of work.
How do I manage a renovation once construction starts?
The difference between a smooth renovation and a stressful one almost always comes down to documentation and communication. Set up a system where every decision, receipt, change order, and photo is logged in one place. That's what Home Stories is designed for — it replaces the five different folders, three notebooks, and half a dozen photos in your camera roll that most renovators use. Get weekly progress photos. Review expenses weekly against budget. Communicate with your contractor through a single channel (email or a project app, not WhatsApp and in-person conversations that disappear). If something changes mid-project, document the scope change, get a revised quote, and approve it before work proceeds.
What should I do before a renovation starts?
Five things: (1) Lock in your budget and have a cushion — 15–20% contingency for anything beyond cosmetic work. (2) Finalise every design decision before demolition: layouts, fixtures, finishes, cabinetry, appliances. Changing your mind mid-project is the most expensive thing you can do. (3) Get permits approved. (4) Order long-lead items (cabinets, custom windows, specialty appliances) as early as possible. (5) Plan your life around the disruption — where will you cook, store food, do laundry, and if it's a bathroom renovation, where will you shower? The more practical details you sort in advance, the less friction during the project.
Keep reading

How to Budget a Home Renovation: 7 Steps to an Honest Budget
How to budget a home renovation — 7 steps to build an honest budget that covers scope, contingency, and every hidden cost.
Kitchen Renovation Timeline: 8 Phases from Design to Handover
Kitchen renovation timeline — 8 realistic phases from design through to handover, with budget tips for each stage.
Renovation Checklist Printable: Your Complete Step-by-Step Guide
Renovation checklist printable — a complete step-by-step renovation checklist you can use to plan and track every phase.