Kitchen Renovation Timeline: 8 Phases from Design to Handover
Most kitchen renovation timelines are optimistic by 30–40%. They assume everything arrives on time, inspections pass first try, and your contractor has no other jobs bleeding into yours. This timeline shows what actually happens on a real kitchen renovation in 2026 — the weeks you plan for and the ones you don't.
A kitchen renovation is one of the highest-stakes projects you can take on in your own home. The budget is usually the largest single line item outside the property purchase itself. The timeline stretches across months. And unlike a bathroom reno — where you can relocate to the guest bath for a week — a kitchen is the engine of your house. When it stops, everything slows down.
I’ve watched three kitchen renovations start to finish — two of my own, one for a friend. The timeline I’m about to give you is a real kitchen in a 1970s Australian house, full tear-out, new cabinetry, new countertops, new flooring, new appliances, moved plumbing, and new electrical. Not a cosmetic refresh. Not a cabinet swap. The full deal.
The timeline below is week-by-week, from the first demo day to the punch list walkthrough. But there’s a hidden timeline before that: design and permits. Most renovators underestimate it by 3–4 weeks.
If you’re after the short answer rather than the full week-by-week, how long a kitchen renovation takes covers the realistic ranges and the delays that cause the spread.
The hidden timeline: design and permits (weeks –4 to 0)
Before the first hammer swings, you need:
Week –4 to –3: Design. Finalise your kitchen layout, appliance schedule, and finish selections. This means choosing cabinet style, countertop material, backsplash tile, paint colours, fixture hardware, and lighting plan. Every decision that involves “let me think about it” on day 60 of demolition is a budget and schedule risk.
Week –3 to –2: Permits. Submit plans to your local building authority. This includes electrical layouts, plumbing changes, structural changes (moving walls, enlarging openings), and sometimes energy compliance documentation. Permit review timelines vary wildly by council or municipality — two weeks to eight weeks, sometimes longer. Do not start demolition until your permit is approved. Building officials will shut down your project on the spot if they show up during demo and there’s no permit on site.
Week –2 to –1: Order long-lead items. Cabinets, countertops, and specialty appliances (induction cooktops, built-in ovens, large refrigerators) have lead times ranging from one week to twelve weeks. Order them during the permit phase, not after demo starts. This is where the most common timeline disasters happen — contractors tearing out a perfectly good kitchen because someone forgot that custom cabinets take three months to arrive.
| Item | Typical lead time | When to order |
|---|---|---|
| Stock cabinets | 1–2 weeks | After design is finalised |
| Semi-custom cabinets | 6–8 weeks | After permit is in hand |
| Custom cabinets | 10–14 weeks | As soon as design is locked |
| Countertops | 2–4 weeks (after template) | After cabinets are measured |
| Specialty appliances | 2–6 weeks | After design is finalised |
| Standard appliances | 0–2 weeks | Any time |
What’s happening now: You’re still living in your house, still using your kitchen. This is the last peaceful phase. It’s also where the real decisions happen — the ones that determine whether your renovation finishes on time or gets stretched by mid-project change orders.
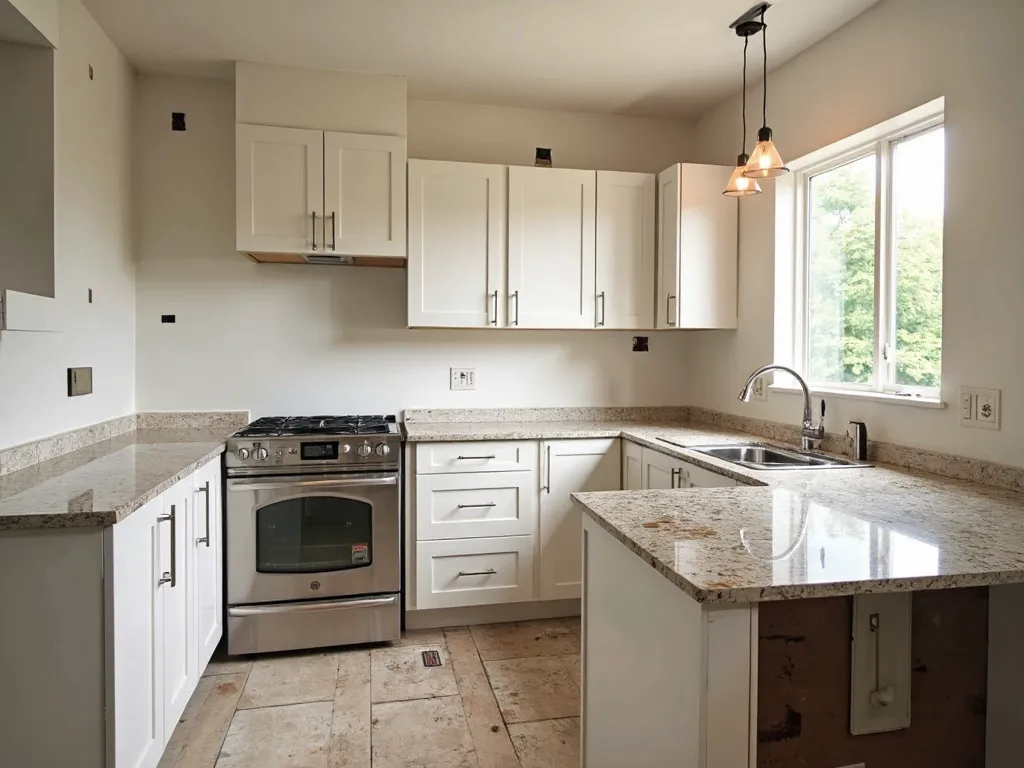
Week 1: Demo and tear-out
The contractors arrive at 7am. The first thing they do is disconnect the gas line, water lines, and electrical feeds. Then the demolition starts — old cabinets come down, countertops are chipped off, flooring is ripped up, and anything that’s getting replaced goes into a skip or dumpster.
What to expect: Loud, dusty, messy. The room becomes a construction zone in about four hours. Everything you own in that kitchen (dishes, food, small appliances) needs to have been moved days before.
What you see: A shell. Walls, floor, and ceiling exposed. It looks like a disaster. This is normal.
What’s behind the walls: Demo is also an investigation phase. Once the old cabinets come down, you might find water damage, outdated wiring, or structural issues that need addressing before you can close the walls again. If you find anything, the project pauses for an engineering assessment and possibly a permit amendment. That’s the timeline risk I mentioned.
Duration: 1–3 days for a standard kitchen. Larger kitchens or those with structural changes take 3–5 days.
Week 2: Rough-in (electrical, plumbing, HVAC)
This is the phase where the invisible infrastructure gets replaced. New wiring goes up, new water and drain lines are run, gas lines are re-piped, and any HVAC work (ductwork for range hoods, new vents) is completed.
What’s happening:
- Electricians install new circuits for appliances, dedicated lines for the fridge, lighting circuits, and outlets for the countertop (now you’ll want at least four, not two).
- Plumbers run new water supply and drain lines to the new cabinet layout. The sink, dishwasher, and fridge ice maker all get new connections.
- HVAC work: range hood ducting (especially important for induction or high-BTU gas cooktops), any ventilation changes.
Inspections: At the end of rough-in, the building inspector visits. They check that all electrical, plumbing, and structural work meets code. This is a critical path item. If the inspector flags something — and they will, every time, on at least one thing — your timeline pauses until the issue is fixed. The fix usually takes 1–2 days. But if there’s a backlog of inspections, you might wait a week for the re-inspection. Build that buffer in.
Duration: 3–5 days of active work, plus 1–3 days for the inspection (depending on council backlog).
Week 3: Walls close up, floor goes down
Once rough-in passes inspection, the walls get closed up. Drywall is hung, taped, mudded, and sanded. In a kitchen, you’ll usually want moisture-resistant drywall (green board) in the splash zone behind the sink and stove.
The subfloor is prepped and finished — new plywood if the old one was damaged during demo, or a levelling compound if the existing floor is uneven.
What you see: The room starts looking like a room again. But it’s still not a kitchen. The walls are white and smooth, the floor is bare subfloor, and the only thing in the room is drywall dust.
Important note: Don’t paint yet. Paint comes after the cabinets are installed, so you can cut a clean line at the backsplash zone and touch up any scuffs from cabinet installers.
Duration: 4–6 days for drywall hang + finish. The sanding dust will settle for another week, but you can walk in after 3–4 days.
Week 4: Cabinets arrive and get installed
This is the moment you’ve been waiting for since the design phase. The cabinets come in and get stacked against the walls. A cabinet installer or carpenter levels, secures, and sequences them — base cabinets first, then wall cabinets, then tall units.
What happens:
- Base cabinets are installed and levelled. Every cabinet needs to be perfectly level because countertops sit on top of them and a crooked cabinet means a crooked counter.
- Wall cabinets are hung. Their height is determined by the countertop and the range hood (if there is one). Standard height is 54cm from the countertop, but this varies.
- Tall cabinets (pantry, appliance garage, oven tower) go in last.
The critical path: If your cabinets haven’t arrived by week 4, the entire project is on hold. The contractors can’t move forward without cabinets because the countertops can’t be templated and installed until the cabinet boxes are in place. This is the single most common timeline disaster.
Duration: 2–4 days for cabinet installation, depending on size and complexity.
What’s happening in parallel: If your cabinets have arrived, the countertemplate order can be placed. This means a technician comes in, measures the exact layout of your cabinets, and produces a digital template that gets sent to the slab fabricator. Countertop templating happens after cabinets are in. The actual countertop install comes later.
Week 5: Countertops and backsplash start
With cabinets in place and templated, the countertop slab arrives and gets installed. This is one of the most satisfying days of any renovation — suddenly, the kitchen looks real. Quartz, granite, or whatever material you chose is set into place, seams are minimised, and the edges are finished.
The backsplash work starts — tiling begins from the countertop up. Depending on your backsplash design, this can take anywhere from half a day (simple subway tile) to 3–4 days (complex patterns, mosaic, or hand-painted tiles).
What’s happening:
- Countertop installers cut the slab on-site (especially for stone), seal it, and set it on the cabinets.
- Tile installers work on the backsplash. They also often install the kitchen floor at the same time if the flooring is tile — but many people lay the flooring before the cabinets, so this depends on your choice.
Duration: 1 day for countertop install (stone needs 2–3 days for fabrication + delivery). Backsplash: 1–4 days depending on complexity.
Week 6: Flooring, paint, and appliance delivery
By this point, several sub-trades should be converging:
Flooring: If the floor is vinyl, laminate, or engineered wood, it’s laid now. If it’s tile, it may have started during the backsplash phase. Hardwood is usually laid before the cabinets go in (under-cabinet height), which is why the timeline above has it here rather than earlier. The material decides the schedule here more than anything else — how long flooring takes to install breaks the difference down by type.
Paint: Walls are painted now. The ceiling was painted during the drywall phase, but the walls get their finish coat after the cabinets are installed so you can cut a clean line where the cabinets meet the wall.
Appliances: If they arrived, they’re staged. If they didn’t, they’re not. The appliances that matter most right now are the range hood (needs ducting connected), the dishwasher (needs plumbing), and the fridge (needs a dedicated electrical circuit).
Duration: 2–4 days for flooring, 1–2 days for paint. Appliances arrive and are staged — not installed yet, because the final plumbing and electrical connections happen next.
Week 7: Rough-in review, final plumbing and electrical
This week is about finishing the mechanical work:
- The plumber connects the sink, dishwasher, and fridge water lines.
- The electrician installs outlets, switch plates, under-cabinet lighting, range hood wiring, and connects the appliance circuits.
- The range hood is ducted and tested.
- The cooktop and oven are connected (gas or electric).
What’s happening: This is the transition from “construction zone” to “kitchen.” The lights come on. The water runs. The outlets work. But the counters are still bare in places where appliances will sit, and the cabinets are still missing handles and drawer slides.
Duration: 2–3 days.
Week 8: Appliances installed, handles and hardware on
The final install phase:
- Countertop cutouts are finished for cooktop and sink.
- The sink is grouted in and caulked.
- The cooktop and oven are set in.
- The dishwasher is plumbed and electrically connected.
- The fridge is placed (not connected, just sitting there).
- Cabinet handles, knobs, and drawer slides are attached.
- The range hood is mounted and connected.
What you see: A fully functional kitchen. It works. You can plug in a kettle, run the faucet, and open a cabinet door. But it’s not finished — there are still unpainted touch-ups, still grout to clean, still a few things to adjust.
Duration: 1–2 days.
Week 9: Touch-ups and cleaning
The final two weeks of any renovation always expand. This is where the punch list happens:
- Paint touch-ups where cabinets were scuffed during install.
- Caulk lines re-done in places where the first attempt wasn’t clean.
- Grout haze removed from countertops and tile.
- Cabinet doors adjusted so they close properly and don’t rub.
- Sink and faucet caulked and tested for leaks.
- The floor is deep-cleaned.
What’s happening: The contractors are coming back for the things they missed or that needed correction. This is normal. Every project has a punch list. The size of your punch list depends on how well the initial trades did their work and how picky you are — both of which vary widely.
Duration: 3–5 days.
Week 10: Final walkthrough and punch list closure
The contractor brings you through the kitchen room by room. Every drawer opens. Every cabinet closes. Every outlet works. Every faucet runs. Every appliance is tested. Anything that doesn’t make the list gets a note.
What happens:
- You walk through with the contractor, testing everything.
- Each issue gets logged on a punch list (again, the printable renovation checklist is the right format).
- The contractor commits to fixing each item by a specific date.
This is the moment the renovation transitions from construction to completion. Everything after this is remedial.
Duration: 1 day for the walkthrough, 2–5 days for punch list items to be fixed.
What the timeline doesn’t tell you
There are two things the week-by-week breakdown above never captures, and they matter as much as the schedule itself.
The decision fatigue. By week four, you’ve made 200 decisions about this kitchen. Cabinet handle style, which outlet to put where, whether the island needs an overhang, what colour grout goes with the tile. Each one seems small. Cumulatively, they exhaust you. The timeline above assumes you’ve already made all these decisions before week one. That’s the right way to plan — but the fatigue is real even if you planned well.
The budget creep. This timeline gives you the duration, but the financial timeline is its own animal. Each week that passes with a partially demolished kitchen is money you’re spending without getting anything back. The contractors are on site, the permits are paid, the demolition happened. And the cabinet order is paid but the cabinets aren’t installed. The budget tracking you set up before you started is what keeps this from spiralling — but you need to be logging every expense as it happens — a phone-first tracker exists for exactly that job.
The timeline at a glance
| Phase | Weeks | Duration |
|---|---|---|
| Design & permits | –4 to 0 | 4–8 weeks (before demo) |
| Cabinet order | –4 to 0 | 1–12 weeks (overlap) |
| Demo | 1 | 1–3 days |
| Rough-in (elec/plumb/HVAC) | 2 | 3–5 days + inspection |
| Walls & floor prep | 3 | 4–6 days |
| Cabinets installed | 4 | 2–4 days |
| Countertops & backsplash | 5 | 1–4 days |
| Flooring & paint | 6 | 2–4 days |
| Final connections | 7 | 2–3 days |
| Appliances & hardware | 8 | 1–2 days |
| Touch-ups & cleaning | 9 | 3–5 days |
| Walkthrough & punch list | 10 | 1 day + 2–5 days to close |
Total active construction: ~8–10 weeks. Total from decision to completion: ~12–20 weeks.
Why this timeline is realistic (not optimistic)
The timelines you see in magazine features and design blogs assume a dream scenario: cabinets arrive on time, inspections pass first try, no surprises behind the walls, and every sub-trade shows up when they’re supposed to. That happens on curated projects with dedicated project managers and unlimited budgets.
This timeline is built for a real renovation with a real contractor, a real council, and real supply chains. It includes:
- A week built into inspections for re-inspection if needed.
- Cabinet lead time factored into the pre-demo phase.
- A full week of punch list work (not the two days magazines show).
- The reality that countertop fabrication has a separate timeline from installation.
- The fact that multiple trades need to coordinate on the same days (plumber and electrician, for example, need to be available in week 7).
If you want to compress this timeline, the only reliable lever is ordering everything early — cabinets, countertops, appliances, and fixtures. The second is choosing stock or semi-custom rather than custom, which saves 4–8 weeks on the cabinet lead time.
But even with both of those, 8 weeks is the floor for a full kitchen reno. Anything faster usually means shortcuts — and shortcuts in a kitchen renovation show up in the next five years as leaky sinks, warped cabinets, and outlets that trip the breaker.
Related posts
- Renovation Budget Template (Free PDF + Google Sheet)
- How to Budget a Home Renovation Without Going Over
- Printable Renovation Checklist: Every Task by Room
- Renovation Contingency Budget: How Much to Set Aside
Ready to track your renovation from day one?
The schedule above gives you the shape of the project. Home Stories gives you the record — every expense logged on the day it happens, every photo of what’s behind the walls saved before it’s closed up, and a running budget that tells you whether you’re on track every single week. Set it up before demo starts so week one numbers are already there.
Home Stories is free on the App Store.
Sources and further reading
The ranges and guidance above are drawn from direct project experience and from the bodies below, which publish the underlying standards, rules and market data. They are worth reading directly before you commit money.
- Housing economics and remodeling market data — National Association of Home Builders
- Building regulations approval — GOV.UK
- How To Avoid a Home Improvement Scam — US Federal Trade Commission
Frequently asked questions
How long does a kitchen renovation take?
A typical full kitchen renovation — demolition, new cabinets, countertops, flooring, tile, electrical, plumbing, and finishing — takes 8–12 weeks from the first day of demolition to the final walkthrough. If you include design, permit approval, and cabinet ordering, add another 4–8 weeks before the hammer even swings. That's a total of 12–20 weeks from decision to finished room. The single biggest source of delay is cabinet delivery, which routinely takes 8–12 weeks from order to install for custom or semi-custom cabinetry.
What is the most time-consuming part of a kitchen renovation?
Waiting for cabinets is the most time-consuming part, both in calendar time and in the psychological toll of watching an active construction site sit idle. Custom cabinets take 8–12 weeks from order to installation; semi-custom takes 6–8 weeks; stock cabinets can be ready in 1–2 weeks but offer limited options. Before that, demolition and rough-in (electrical, plumbing, HVAC) are the most labour-intensive, but they move fast — usually 3–5 days. The timeline stalls at cabinets, not at the work itself.
Can I live in my house during a kitchen renovation?
Yes, most people do. But you need a Plan B for cooking. During weeks 4–8 (cabinet and countertop install), your kitchen will be partially or entirely inoperable — usually without running water or electricity depending on how the electrician and plumber sequence their work. Most renovators set up a temporary cooking station in another room or on a folding table, lean on takeout, and plan to eat out a couple of times a week. If your renovation is more ambitious — moving walls, changing the floor plan, or moving plumbing — a temporary kitchen becomes less practical and you might consider short-term accommodation during weeks 5–7.
What usually causes a kitchen renovation timeline to go over?
Three things account for most overruns: cabinet delays (the most common, and largely outside your control), unexpected conditions behind walls (old wiring, water damage, structural issues that appear once the demo starts), and permit or inspection delays that hold up the rough-in phase. A smaller but real contributor is design-changes mid-project — someone decides they want a different layout once the cabinets are already ordered. The fix is simple: finalise every decision before the first demo day, build contingency into your timeline (plan for 12 weeks, expect 10), and don't order anything until your permits are approved and your design is locked.
Should I order cabinets before the renovation starts?
Yes. Cabinet lead times are the single longest lead item on any kitchen renovation timeline. Order as soon as your kitchen layout is finalised — ideally during the design phase, before demolition begins. If you order stock cabinets, they may arrive in 1–2 weeks. Semi-custom takes 6–8 weeks. Custom can take 12 weeks or more. If your contractor starts demolition before your cabinets arrive, you're paying for idle labour or sitting in a partially demolished kitchen that you can't use — both expensive.
What should I do before a kitchen renovation starts?
Lock in your design, get permits approved, and order your cabinets and any long-lead appliances (range hoods, built-in ovens, specialty sinks) before the first demo day. Clear your kitchen of small appliances and pantry items. Decide on every finish — faucet, handles, backsplash tile, paint colour — before work starts, because changing your mind mid-project costs time and money. Make a temporary cooking plan for the weeks you'll lack a working kitchen. If you have kids, plan where they'll do homework and homework snacks during a noisy, dusty construction zone. Set up a budget tracker like <a href='https://apps.apple.com/app/id6754754960'>Home Stories</a> so you're logging expenses in real time from day one, not catching up at the end.
Keep reading
How to Plan a Home Renovation: 6 Phases from Idea to Handover
How to plan a home renovation — 6 phases from inspiration to handover, with what to track and watch for at each stage.
Renovation Contingency Budget: How Much to Set Aside and Why
Renovation contingency budget — why you need 15-20% extra, where surprises come from, and how to track your contingency.

Renovation Cost Overrun Statistics: What Homeowners Should Know
Renovation cost overrun statistics — why 70%+ of renovations exceed budget, what causes the biggest overruns, and how to avoid them.